
Shopping Cart

Depending on the type of floor you want to paint with 3D effect resins and the finish you want, you will need to use different materials, which we will explain below: high-build epoxy bases, high-build multi-layer epoxy, self-leveling epoxy resin paint, epoxy primer, self-leveling epoxy varnish, self-leveling elastic polyurethane for exteriors, etc.

What are 3D liquid soils ?
3D floors are a work of art that will radically change our idea of floors.
These floors are achieved through several layers, one on top of the other, depending on the desired finish.
The first layer is a self-leveling base, which offers the safety and firmness of any conventional floor.
If we need to cover tile joints larger than 3 mm, we can use a high-thickness epoxy base under the self-leveling epoxy so we don't have to apply several coats of self-leveling epoxy.
On top of this first layer, the image is installed that will reveal the final finish, which can be a photo, a vinyl, a drawing, metallic effects, or whatever we want.
Then the two-component, transparent, self-leveling epoxy resin is injected, and depending on the desired finish, the effect will be complete.
WHAT PRODUCTS DO I NEED TO MAKE A 3D FLOOR?
We will detail the products you might need in each case to create a 3D floor with two-component liquid epoxy resin.
FIRST STEP: APPLY A PRIMER

The first thing you will have to do is apply a high-build water-based epoxy primer.
The colorless, solvent-free epoxy primer with excellent adhesion to concrete floors is used for epoxy systems thicker than 1mm.
It seals, fixes and regularizes the substrate.
It serves as a smoothing agent for multi-layer or self-leveling pavements, mixed with aggregates.
Remember that if you are going to apply it to damp floors, you will need to use an epoxy primer for damp floors.
SECOND STEP: APPLY A TWO-COMPONENT SELF-LEVELING EPOXY RESIN

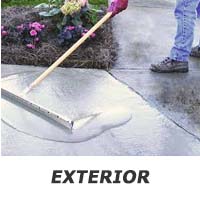
Remember that this type of self-leveling epoxy resin can only be used on indoor floors. If you want to create an outdoor floor, you should use a two-component self-leveling polyurethane resin .
For both indoor and outdoor floors, if the required leveling layer is more than 3 mm thick (which can be achieved with both self-leveling two-component epoxy resin and two-component polyurethane resin), you must apply an adhesive epoxy paint for high-thickness primers or leveling layers before applying the self-leveling resin.
Once we have applied the base coat, if needed, we can proceed to apply the TWO-COMPONENT SELF-LEVELING EPOXY RESIN PAINT. This paint can be purchased in any color from the RAL color chart. We can use one color for the base, or different colors for drawings or murals.
The two-component self-leveling epoxy paint can also be used for the preparation of self-leveling mortars, and mortars combined with marble or glass.
IF YOU WANT TO BUY TWO-COMPONENT SELF-LEVELING EPOXY RESIN PAINT, CLICK HERE.
If we don't want a 3D effect finish, vinyl decals, metallic effects, etc., we can consider the floor finished at this point. Our 2-component self-leveling epoxy paint serves as an excellent quality, highly traffic-resistant, and durable finishing paint.
If we want to continue decorating our floor with 3D effects, we will move on to the next step.
THIRD STEP: APPLY VINYL, PAINT DESIGNS, ADD METALLIC EFFECTS....
We must keep in mind that when buying vinyl, the material will have to withstand the varnish that we are going to apply on top to protect it, a self-leveling water-based epoxy resin varnish.
We recommend that the vinyl be thick enough to prevent movement or stretching over time. We also advise, for better adhesion of the protective varnish, that the vinyl not cover the entire floor surface, but rather that there be areas where the self-leveling varnish can anchor itself to the self-leveling epoxy resin paint so that it lasts longer and doesn't chip in some places.
Once you have applied the vinyl, created metallic effects with metal powder, or created your artwork, we will move on to the next step.
FOURTH STEP: APPLY A TWO-COMPONENT EPOXY RESIS VARNISH (SELF-LEVELING OR NOT depending on the desired finish)

To protect the vinyl, or the effects we have created, we must apply a self-leveling, two-component epoxy resin clear varnish that gives us depth and shine and serves as a finishing coat.
If you don't want a 3D effect, you simply need to protect the metallic effects of the vinyl; you don't need to apply a self-leveling varnish, you can apply either a two-component water-based epoxy resin varnish or a two-component water-based polyurethane resin varnish (in this case we also have a matte finish).


Comments (14)